Sponsors


Set My Image’s White Balance?
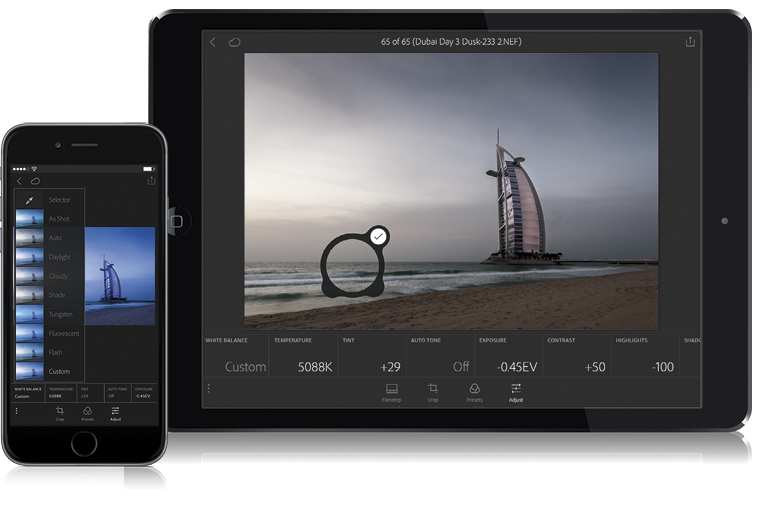
Tap on the image you want to adjust, then tap the Adjust icon in the options bar at the bottom of the screen to bring up the adjustment tiles. Tap on the White Balance tile, and it brings up a pop-up menu of white balance presets (as seen in the phone above) with a small thumbnail preview of how your image would look with each of the different white balance presets. Click on any one of those to apply the preset. (Note: You’ll only see this many presets if you shot in RAW. If you shot in JPEG, you’ll only see Auto and Custom, and custom means you’re doing it manually, so there’s really only one preset for JPEG images. But, you can still do the next two methods for setting your white balance.) There are also Temperature and Tint tiles for setting the white balance manually—just tap on either tile, and a slider appears at the bottom of your image, which you can drag to make your image warmer or cooler. A third method is setting the white balance using the White Balance Selector tool (just like you would in LR desktop). You find this tool at the top of the White Balance preset menu. Tap on it to make it active, and it brings up a little round Loupe (seen above). Move this around, and it’ll give you a live preview as you drag, but to see the preview, you have to release your finger from the screen. So, tap-and-drag it somewhere, then release your finger for a moment to see a preview. When you like how the white balance looks, tap on the checkmark in the top right of the Loupe. To undo this white balance adjustment, tap on the White Balance tile to bring up the presets again, then tap the As Shot preset.