Sponsors


Make My RAW Image Look More Like the JPEG I Saw on the Back of My Camera?
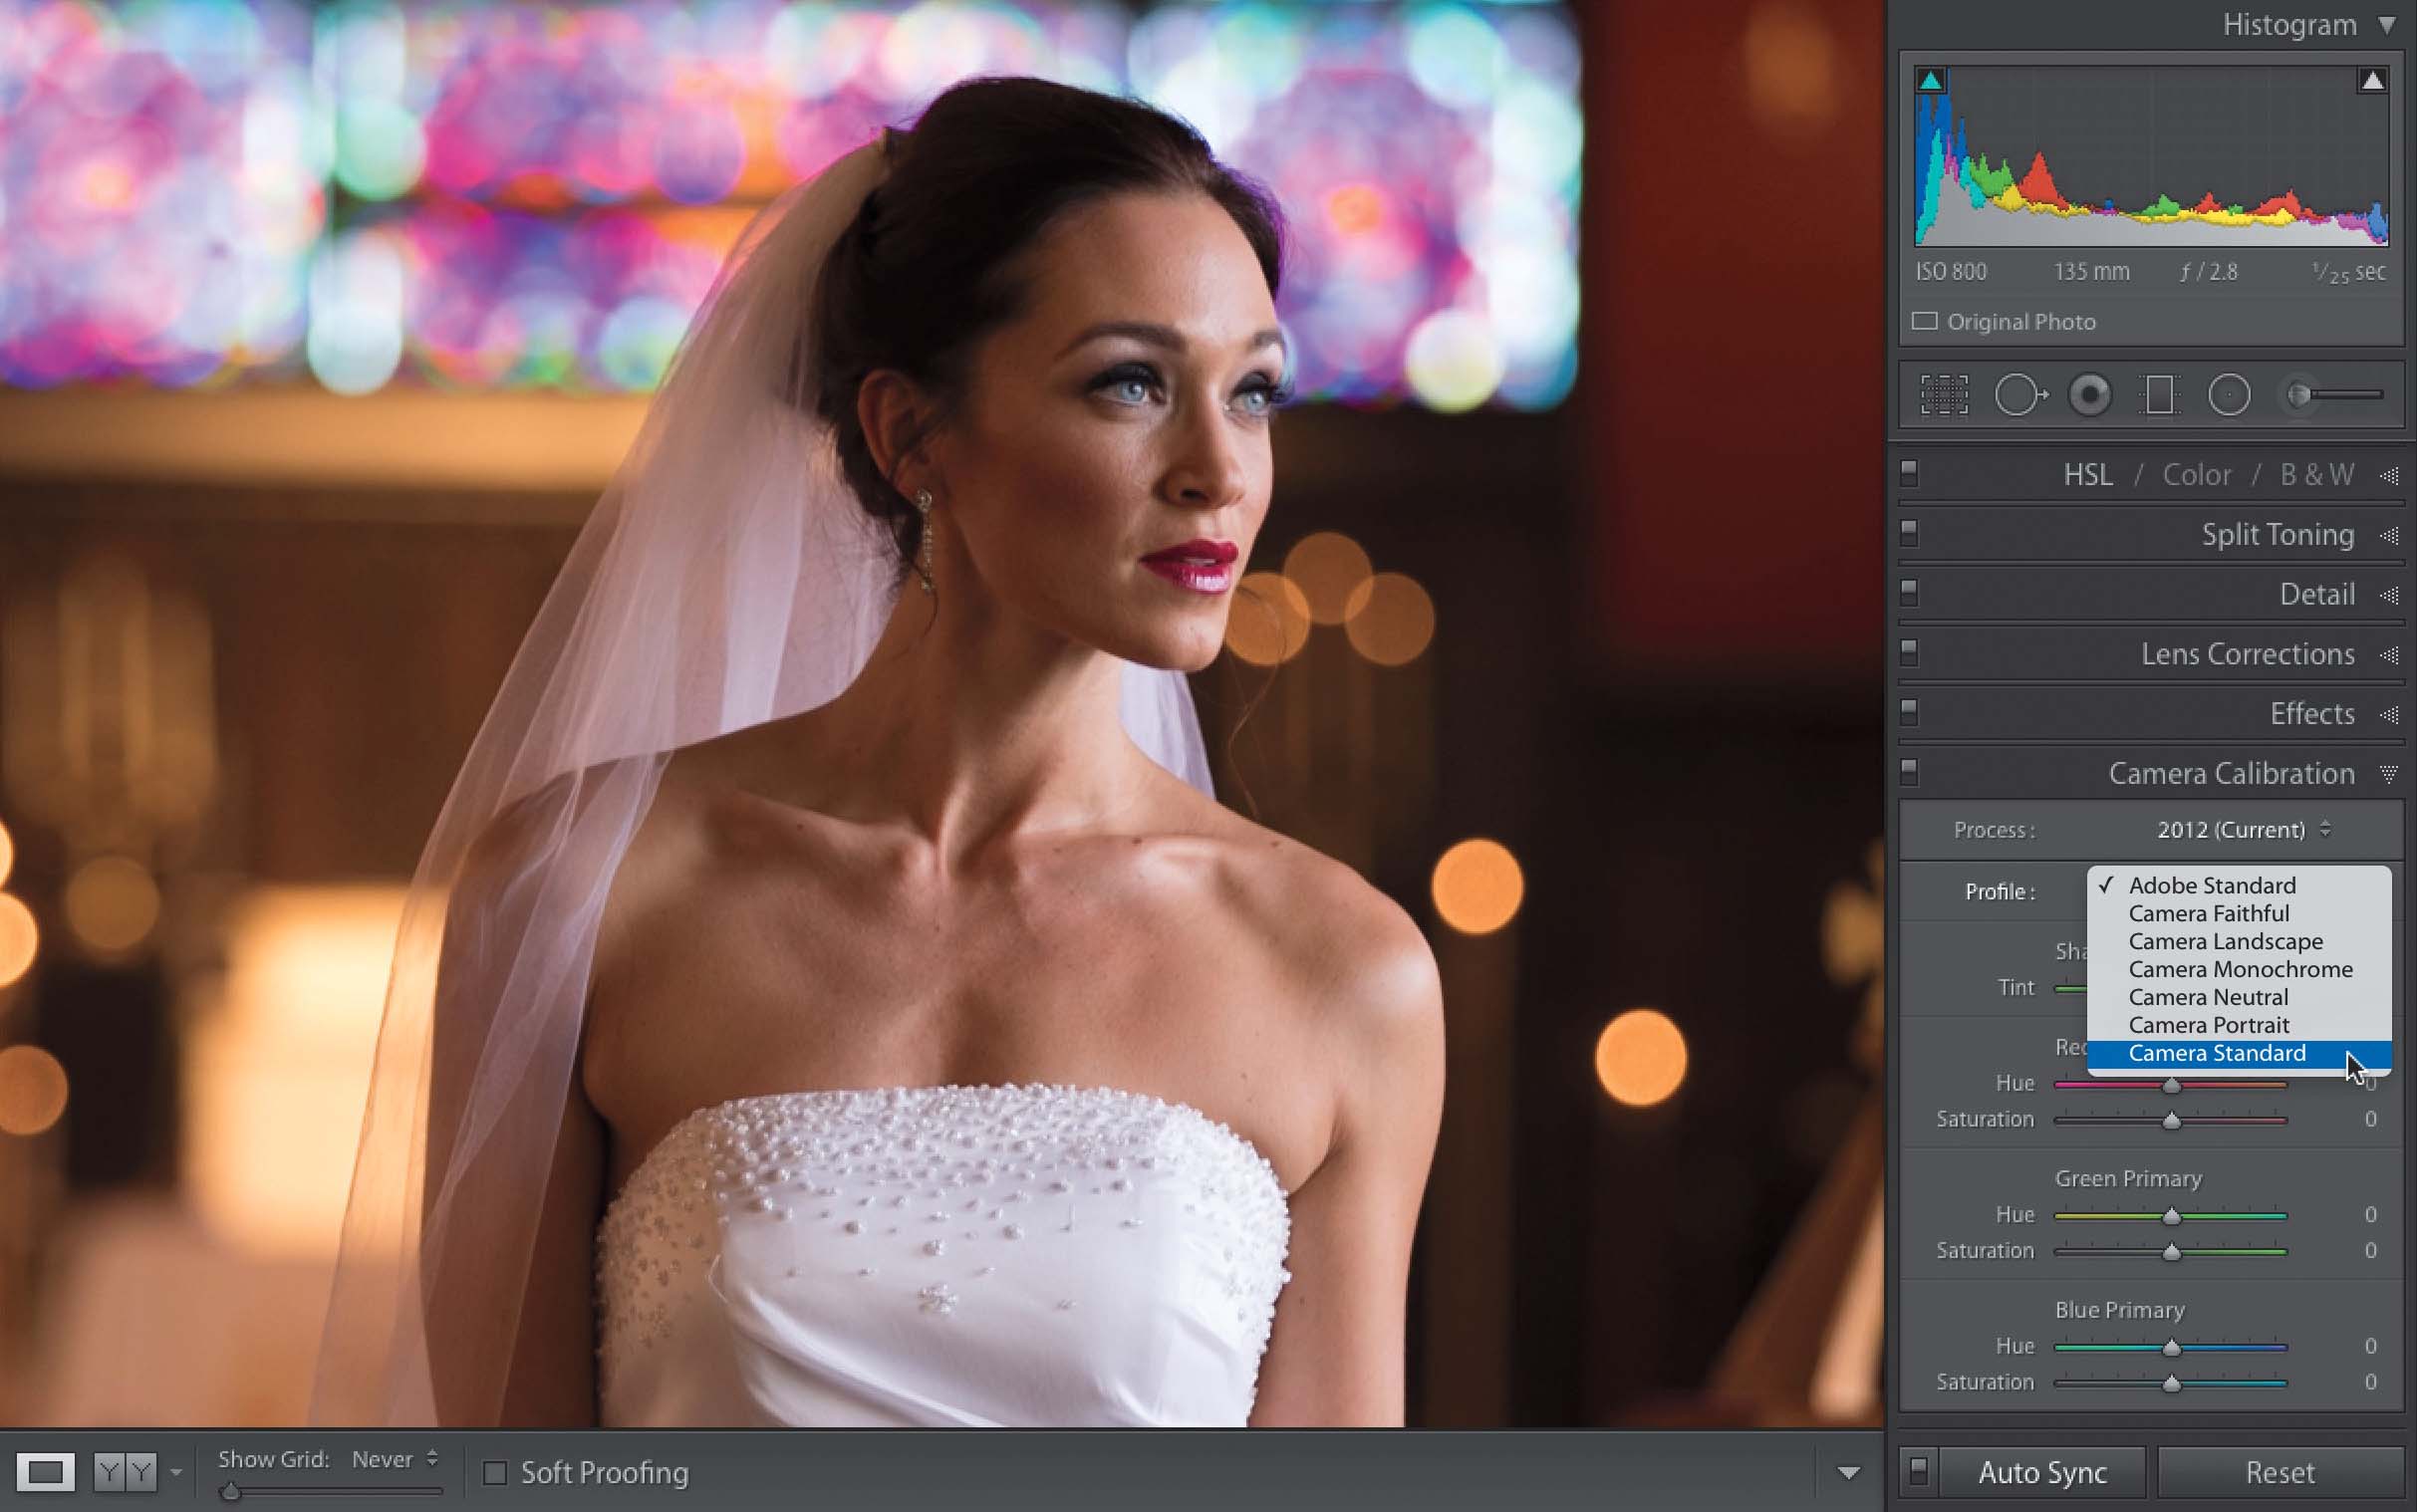
Go to the Camera Calibration panel (in the Develop module’s right side Panels area), and go through the different profiles in the Profile pop-up menu to find the one that looks the most like your JPEG file. Why would you want your RAW image to look like a JPEG image? It’s because JPEG images, in the camera, are sharpened, and more contrasty, and more colorful, and they all have this stuff added in-camera to make them look great. When you switch your camera to shoot in RAW mode, you’re telling it to turn all that sharpening, and contrast, and stuff off, and just give you the RAW photo (so you can add your own amount of sharpening, etc., using Lightroom or Photoshop, or whatever). So, your images look flatter when you shoot in RAW. What’s worse is, even though you’re shooting in RAW, your camera still shows you the nice, colorful, sharp JPEG preview on the back LCD, so you only see the flat version once you’re in Lightroom, and only once the RAW image fully loads (until then, Lightroom shows you the JPEG preview, again). By the way, the way I find a profile that looks most like the JPEG preview is to take a few shots in RAW + JPEG mode (so your camera creates both a fully processed JPEG photo and the more flat-looking RAW image at the same time). Import both of those images, put them side by side, then click on the RAW image and try out the different profiles, and you can easily see which profile looks most like the JPEG. You can then save that as a profile preset and even apply that preset to your RAW images as you’re importing them (see how to apply a Develop module preset on import on page 8 in Chapter 1).