Sponsors


Straighten a Crooked Photo?
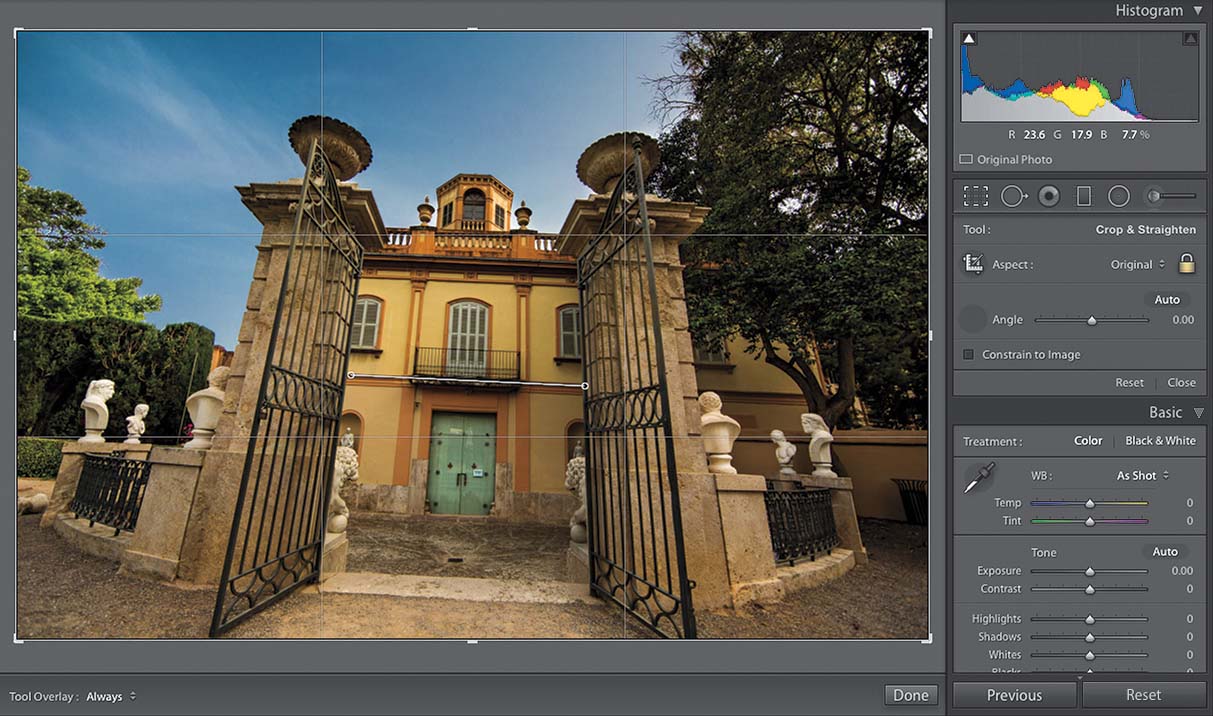
There are a number of ways to do this, so let’s start with clicking on the Crop Overlay tool (R) right under the Histogram panel (in the Develop module’s right side Panels area). In the tool options that appear right below, you’ll see the Straighten tool (it looks like a level). Click on it and then drag it along an edge in your image (as seen above, where I’m dragging it along an edge in the middle of the building) that you want to be straight (for example, in a landscape photo, you’d drag it along the horizon line), and it straightens your photo. The second method is to let Lightroom automatically straighten it for you, and there are a few ways to do this: (1) Click on the Auto button above the Angle slider, or just (2) press-and-hold the Shift key and double-click directly on the word “Angle.” If you’re not happy with these auto results, then (3) go the Lens Corrections panel and, in the Basic tab, turn on the Enable Profile Corrections checkbox, then click on the Level button (it’s the first in the second row, in the Upright options). Lastly, you could just do it yourself by rotating the photo until it’s straight: click on the Crop Overlay tool, move your cursor outside the cropping border, and then click-and-drag in the direction you want to rotate. Stop dragging when the image looks straight, then press the Return (PC: Enter) key to lock in your crop.