Sponsors


Apply Smart Previews? (And Why Should I?)
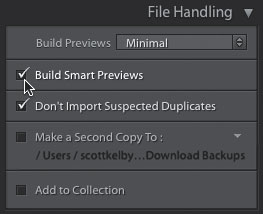
So, why would you want a smart preview in the first place? It’s mostly for two groups of users: (1) You work on a laptop and don’t have a ton of hard drive space, so you use an external hard drive to store your high-resolution images. But, when you travel and disconnect that hard drive, you can’t edit your photos in the Develop module because they’re just small thumbnail previews, and Lightroom won’t let you edit low-res junk. A smart preview is a larger preview, but specially compressed so it doesn’t take up much room on your hard drive (only around 1MB apiece). These smart previews can be edited in the Develop module (cropped and everything), just like you had the high-res version there (they can even be printed up to a certain size). When you reconnect your hard drive, it updates the high-res images with all the changes you made to the smart previews (pretty smart, eh?). (2) It’s for users who work with Lightroom on their mobile devices (it uses these smart previews to do its thing). Luckily, creating smart previews on import is about the easiest thing you can do: in the Import window, in the File Handling panel (in the top right), just turn on the Build Smart Previews checkbox, and it will build them as they’re imported (it doesn’t slow things down because it builds them in the background once they’re imported. You can see their progress in the Activity Center—just click directly on the Lightroom logo in the upper-left corner of the Library module).