Sponsors

Add a Caption Under My Picture?

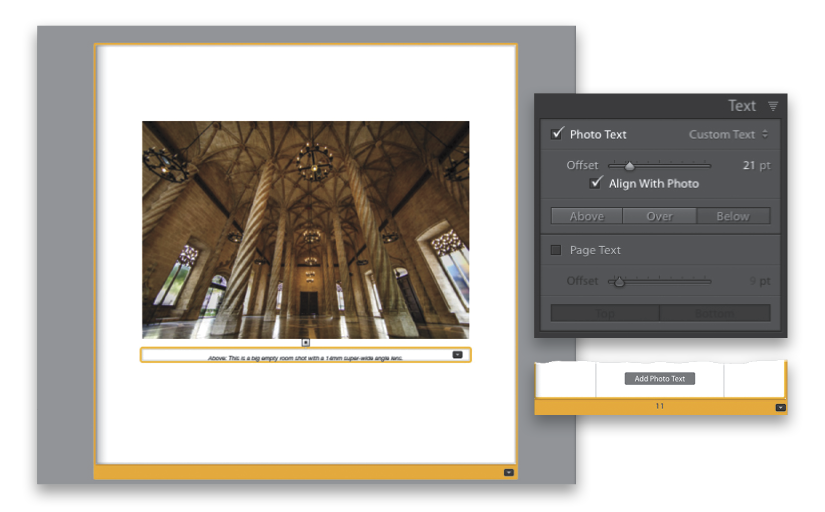
If you selected a layout that allows text and you click on a page, you’ll see a button appear near the bottom that says, “Add Photo Text” (shown in the inset above, bottom right). Click on that button and it creates a text field under your image (seen above) where you’ll enter a photo caption—just click inside that yellow-bordered text field and start typing. Once you’ve typed in your caption, you can choose your font and/or style (like italic, bold, etc.,) in the Type panel (in the right side Panels area). If you go to the Text panel (not the Type panel—the Text panel, seen in the inset above, top right, and also in the right side Panels area), you’ll find some options for where the caption appears (Above, Below, or Over the image), and you can use the Offset slider to choose how close to the photo you want your caption text. By default, it expects you to type in your caption, but it can also pull EXIF data automatically and put it in this caption field (stuff like your f-stop, ISO, shutter speed, camera make and model, lens choice, etc.), and you can choose this from the pop-up menu to the right of the Photo Text checkbox.


