Sponsors


Add a Watermark to My Images?
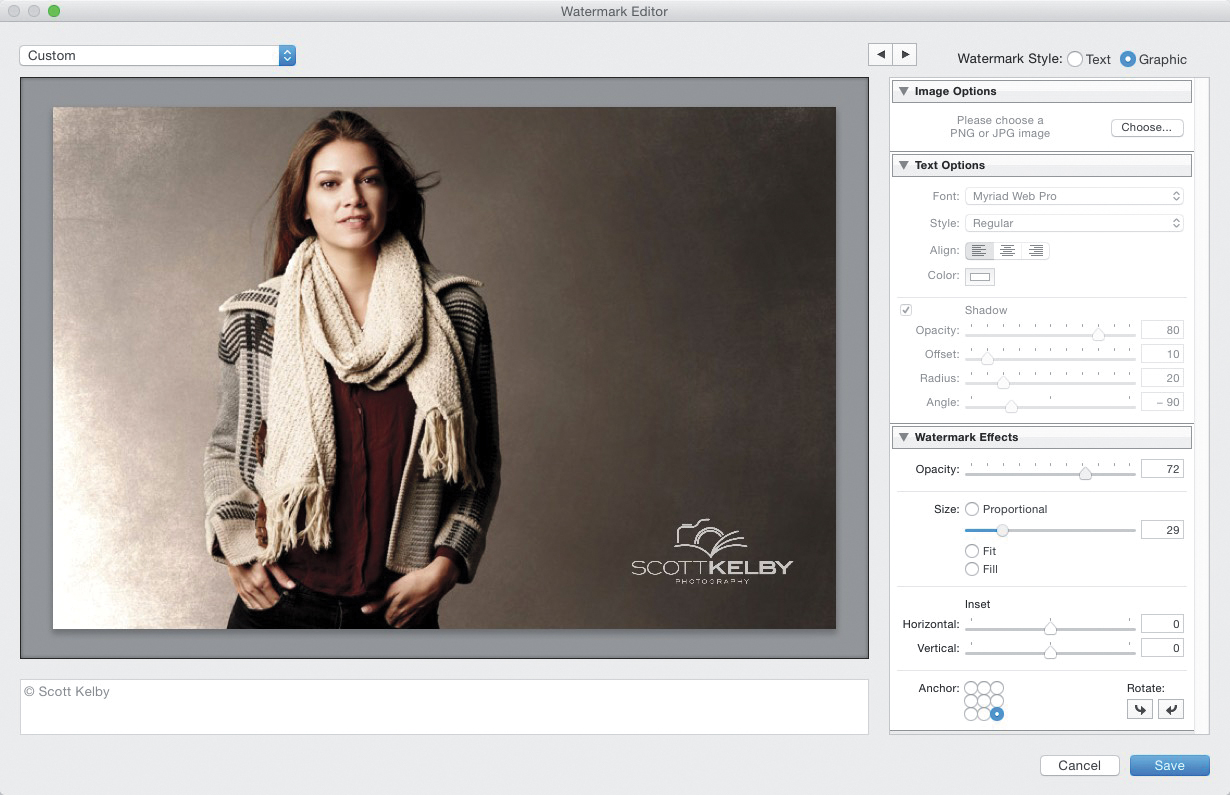
Scroll down in the Export dialog (Command-Shift-E [PC: Ctrl-Shift-E]) to the Watermarking section, and turn on the Watermark checkbox. From the pop-up menu to the right, choose Edit Watermark to bring up the Watermark Editor (seen above). This is where you create and apply your watermark. If you have a logo you want to use as your watermark, then for the Watermark Style at the top right, click on the Graphic radio button, then click on the Choose button, right below in the Image Options section, and find your logo (which is what I did here). Once it appears, position it over the image using the Anchor grid of nine dots in the Watermark Effects section. That’ll get it close to where you want it, and then you can use the Inset Horizontal and Vertical sliders to put it right where you want it. There’s a Size slider, two rotate buttons, and an Opacity slider (if you want your logo to be see-through; I lowered mine to 72%) in this section, as well. If you want a text watermark, go back up and click on the Text radio button for the Watermark Style. Now, just type in your text in the field below the preview area (by default, it uses the name you registered the software in, but you can just highlight that and type in anything you like), and then in the Text Options section, choose your font options, as well as if you want to add a drop shadow to help it stand out. When you’re done with your watermark (graphic or text), you can save it so you don’t have to create it again: from the pop-up menu, up in the top-left corner of the dialog, choose Save Current Settings as Preset, and give it a name. Now, it will appear as a choice in the Export dialog’s Watermark pop-up menu when you turn on the Watermark checkbox.