Sponsors


Save My Image as a JPEG or TIFF?
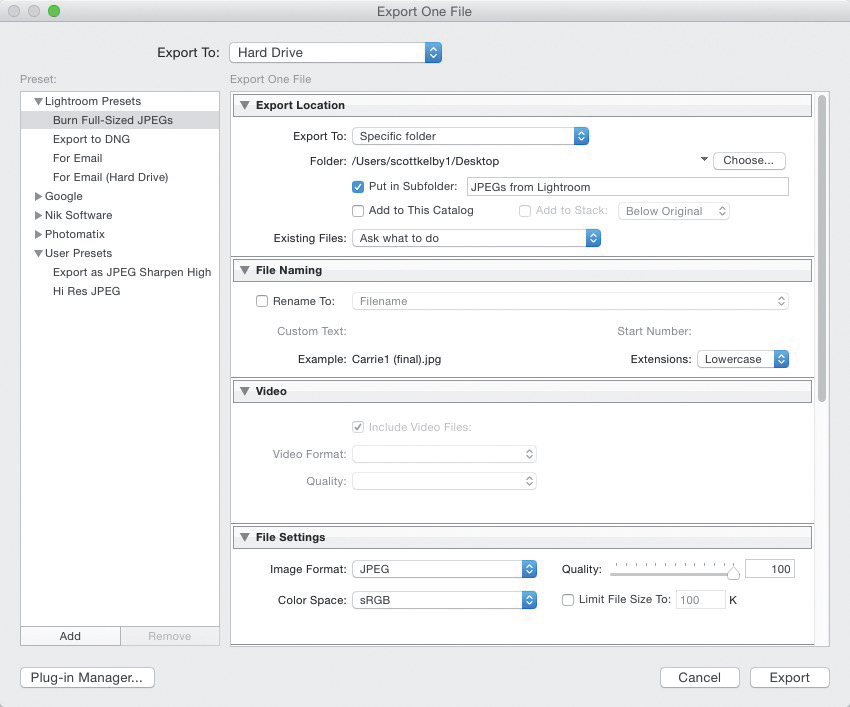
Click on the image(s) you want to save as a JPEG, TIFF, etc., and then press Command-Shift-E (PC: Ctrl-Shift-E) to bring up the Export dialog you see above (by the way, Lightroom’s word for “Save” is “Export,” so think of it as though you’re “exporting” your image outside of Lightroom). Besides using that keyboard shortcut, you can also go to the bottom of the left side Panels area in the Library module and click on the Export button. Once the Export dialog is open, from the Export To pop-up menu at the top, choose where you want this saved image to go (do you want it saved on your hard drive? For email? Go “old school” and burn it to a CD or DVD? Maybe you could make a VHS tape while you’re at it? Okay, sorry, that was mean). Anyway, that’s the first item on your agenda—choose what you’re going to do with it—then start down through the rest of the dialog, answering everything from where on your hard drive you want it saved (provided you chose Hard Drive from that pop-up menu), to which file format you want it saved in (JPEG, TIFF, PSD [Photoshop’s native format], or DNG [Adobe’s digital negative format]), or if you just want to export the original file as-is (perhaps you want to just take a RAW file out of Lightroom). Adobe put some presets over on the left to get you going (I think of them as starting points—you click one and it gets you close to what you want, then you just change or turn on/off any options you want/don’t want. When you’re done, click the Export button in the bottom-right corner, and you’ll see an export progress bar appear in the Activity Center (in the top-left corner of Lightroom), so you’ll know when it’s done exporting.