
Sponsors



Increase Just One Color, Like Blue?
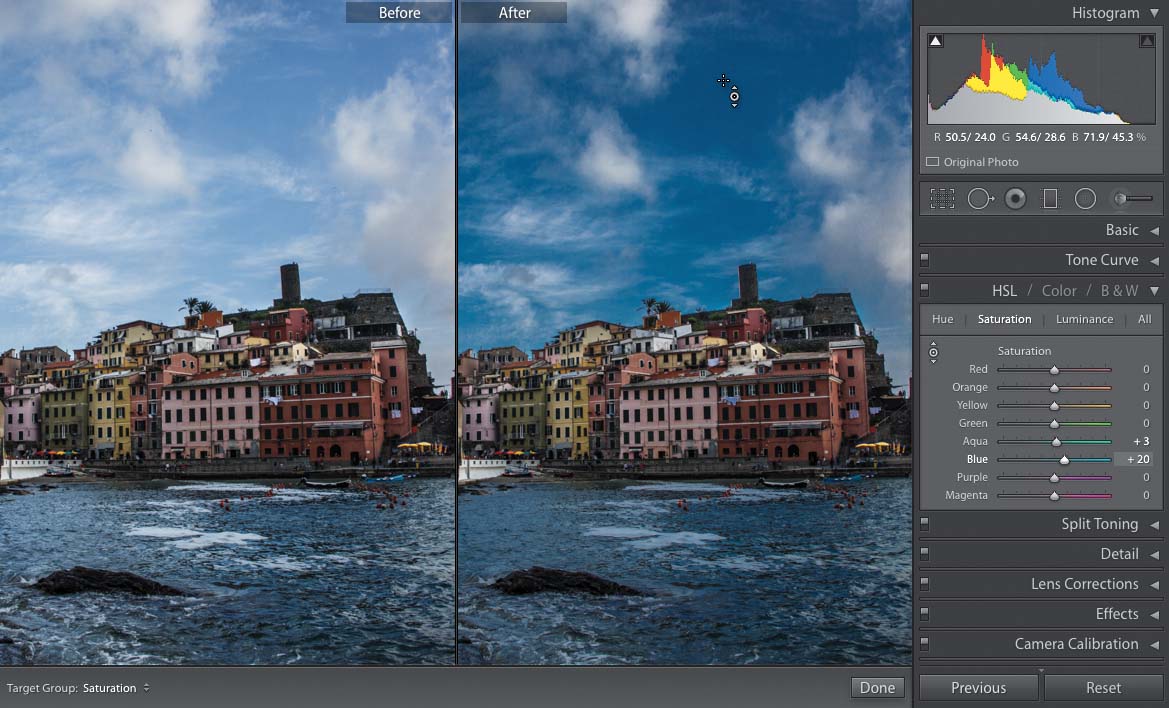
Go to the Develop module’s HSL panel (in the right side Panels area; click directly on the letters “HSL,” which stand for Hue, Saturation, and Luminance), and then click on the Saturation tab up top. At the top left of the panel, you’ll see a little tool—its icon looks like a tiny target—and when you move your cursor over it, two little arrows appear above and below it. That’s the TAT (Targeted Adjustment Tool). Click on it to activate it, then move it out over the area in your image that has an individual color you want to boost (or desaturate, for that matter)—like a blue sky or green grass or someone with a yellow shirt—and just click-and-drag it upward to increase the amount of that color (and any associated colors. For example, the sky might be made up of not just blues, but aquas, as well. It knows and will move both sliders for you automatically as you drag). Click-and-drag downward to reduce the vibrance of that color. To change the brightness of the colors, click on the Luminance tab, then click-and-drag the TAT downward, and the color gets deeper and richer. If you want to actually change the color (for example, you want that yellow shirt to be green), first click on the Hue tab up top, and then click-and-drag the TAT up/down until the color changes to what you’re looking for. Note: This doesn’t just change that one color in that one area—it changes all the similar colors in the image. So, if you have a blue sky, and your subject is wearing a blue shirt, know that both will change when you make an adjustment to one blue area.