Sponsors


Use One-Click Effects?
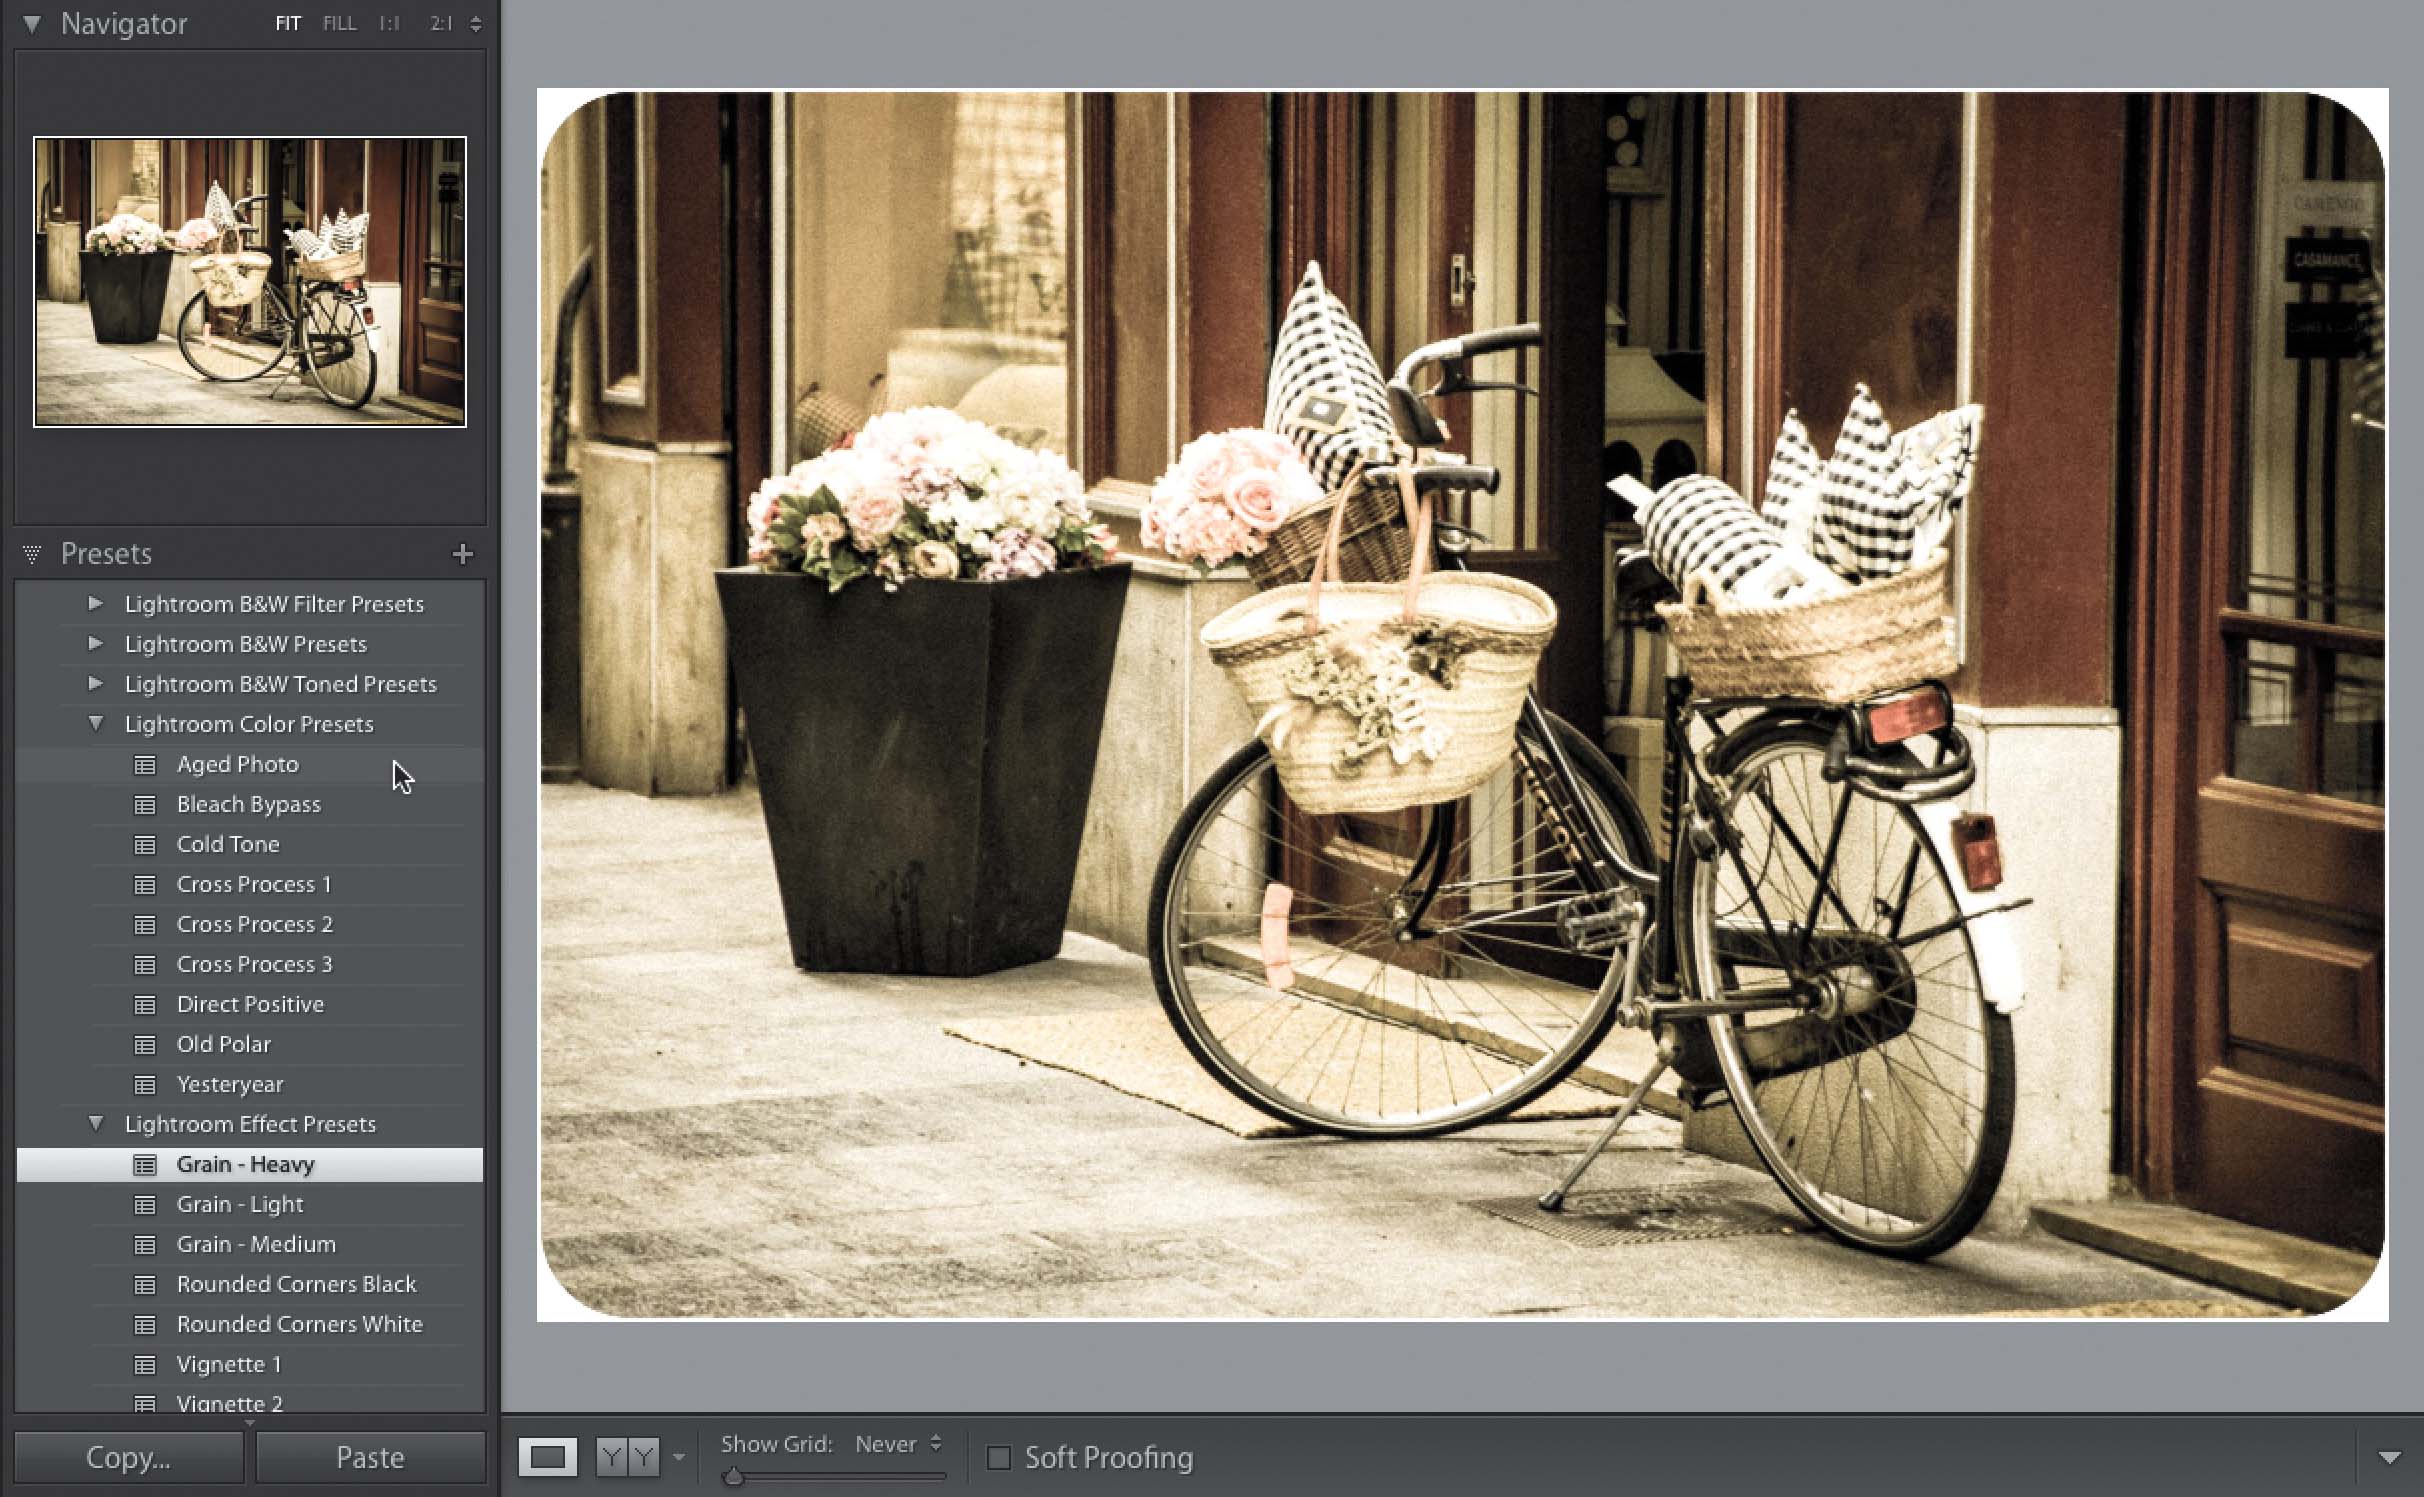
Go to the Presets panel, in the Develop module’s left side Panels area, and you’ll see sets of different pre-designed one-click preset effects put there by Adobe. To see a preview of how these presets look, just move your cursor over any of the presets and then look up in the Navigator panel at the top of the left side Panels area. When you see one that looks good to you, just click on it, and it applies that look. One thing you need to know about presets is that all they do is move Lightroom’s sliders to create a particular look (they don’t do things you couldn’t do yourself if you knew which sliders to drag). But, to understand why that matters, try this: apply the Aged Photo preset under Lightroom Color Presets, then go look at the sliders in the Basic panel, and you’ll see it adjusted the white balance (Temp and Tint), Blacks, Saturation, and Vibrance sliders. Now, click the next one down—Bleach Bypass—and all the sliders change. So, can you not stack one preset on top of another? You can, as long as what it does doesn’t affect the sliders your first preset used. For example, above, I applied the Aged Photo preset. Then, I was able to apply the Rounded Corners White preset (under Lightroom Effect Presets) because the sliders it uses to create the border are in the Effects panel—applying it leaves the Basic panel sliders untouched. For the same reason, I was able to apply the Grain – Heavy preset (also under Lightroom Effect Presets), because it only uses the Grain sliders. If you look up at the preview in the Navigator panel, you’ll be able to see if the preset you’re about to apply will mess up what you’ve already applied.