
Sponsors




Crop and/or Rotate Images?
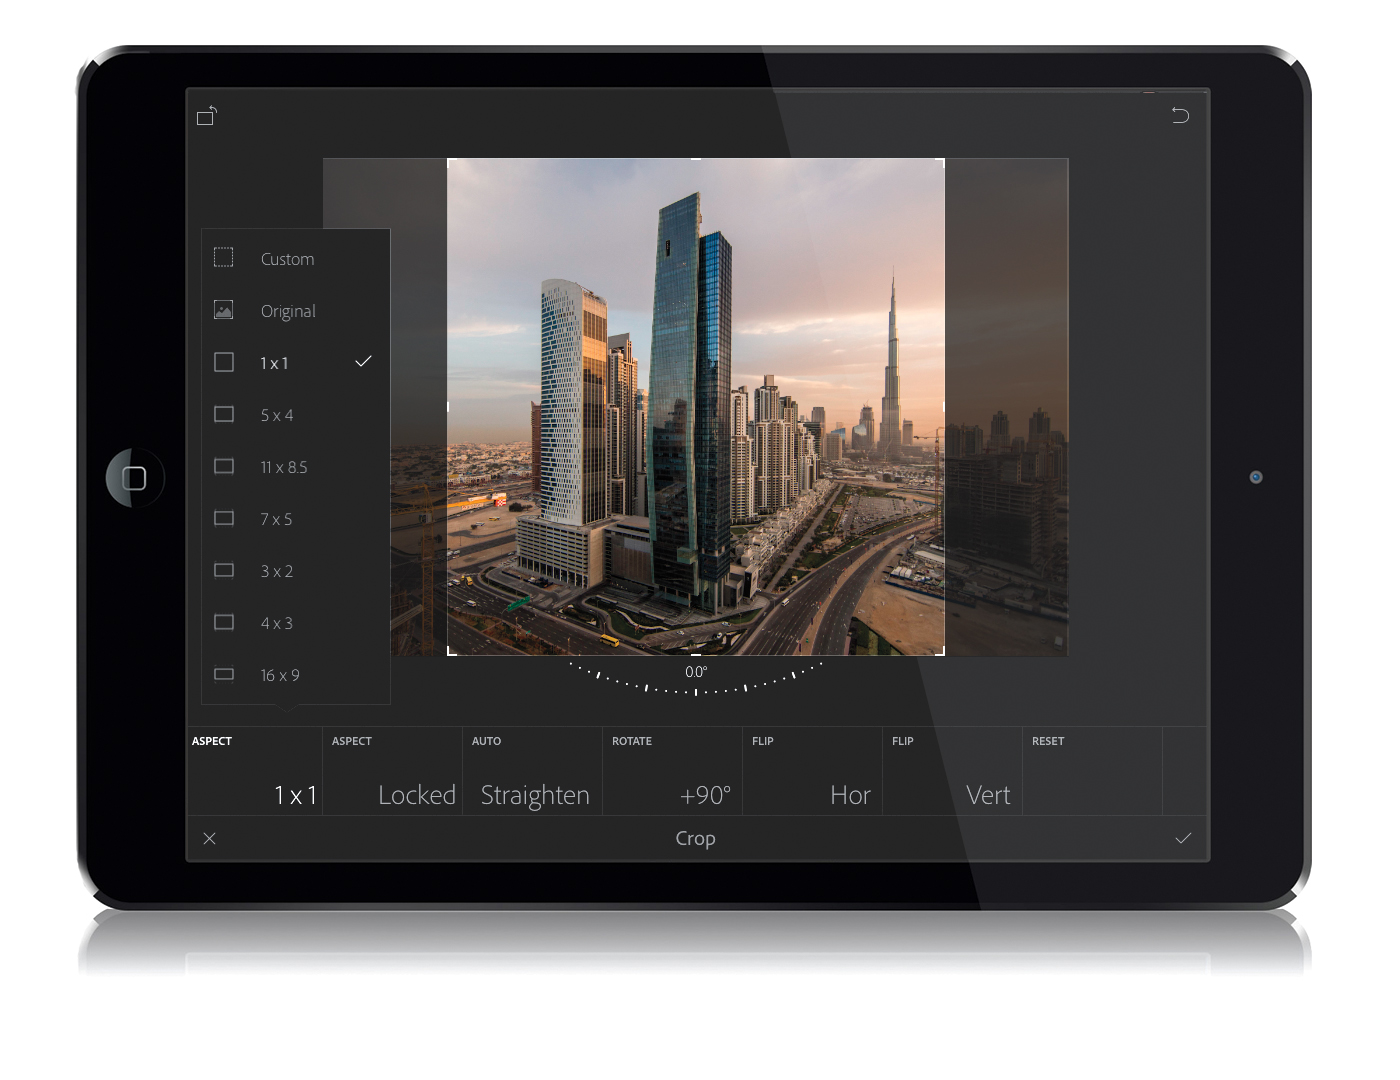
Tap on the image you want to crop to enter Loupe view, then tap on the Crop icon
in the options bar at the bottom of the screen. By the way, if for some reason you see flags and stars there, instead of four icons that read Filmstrip, Crop, Presets, and Adjust, just swipe the options bar to the left to hide those and bring up the editing controls. Okay, once you’ve clicked on the Crop tool, a horizontal row of what Adobe calls “adjustment tiles” appears under your image. Tap once on the Aspect tile, and a pop-up menu appears with standard cropping aspect ratios—just tap on any one you want and it applies that crop (here I tapped on the 1×1 ratio). To reposition your image within the crop, just tap-and-drag the image where you want it. The other tiles here are pretty obvious (Auto Straighten, rotate in 90° increments, or flip it horizontally or vertically). There’s also a Reset tile, in case you just want to start over. If you want to do a freeform crop (where your crop is unconstrained, like hitting the unlock icon in LR desktop), then tap on the Aspect tile, choose Custom, and now you can tap-and-drag the borders anywhere you want them, or tap-and-drag up/down outside the borders
to do a free rotation.