Sponsors


Tweak How My Image Looks?
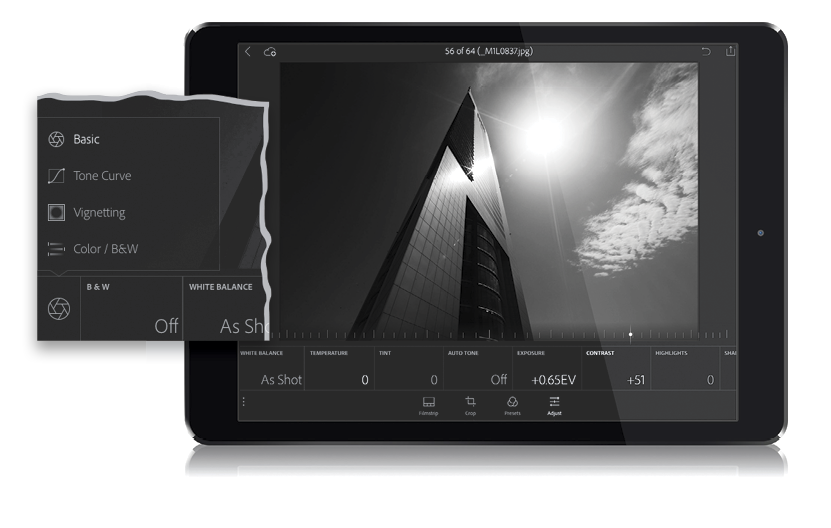
Tap on the image you want to tweak to enter Loupe view, then tap on the Adjust icon in the options bar at the bottom of the screen to bring up a row of adjustment tiles under your image. By default, the Basic options appear, and you’ll notice they have the same names and appear in the same order as they do in Lightroom desktop’s Basic panel. If you tap on the first tile on the left (the one with the Basic icon), you’ll get a pop-up menu of all the panel options available to make adjustments in (Basic, Tone Curve, Vignetting, and Color/B&W; as seen in the inset above). Now, in the Basic options, you might want to tap Auto Tone first, just to see how it looks. Sometimes it’s awesome, sometimes it’s awful, but it’s worth a tap either way. If you tap it and it doesn’t look good, just tap it again to turn it off. To make a particular adjustment, tap on the tile (let’s say Contrast, for example) and a slider appears over the bottom of your image that you can tap-and-drag to add (drag to the right) or remove (drag to the left) contrast, and you see the results live as you drag your finger. To reset any slider, just double-tap right on the little slider knob. Highlights, Shadows, Whites, etc., all work the same way, and you also can tap-and-hold two fingers directly anywhere on the slider you’re adjusting to see if there’s any clipping in the image (the screen will turn black [or white for Shadows/Blacks] and any clipping areas will appear in the color that’s clipping or white [black for Shadows/Blacks] if all the colors are clipping in a particular area).