Sponsors


Replace the Lightroom Logo with My Own Logo?
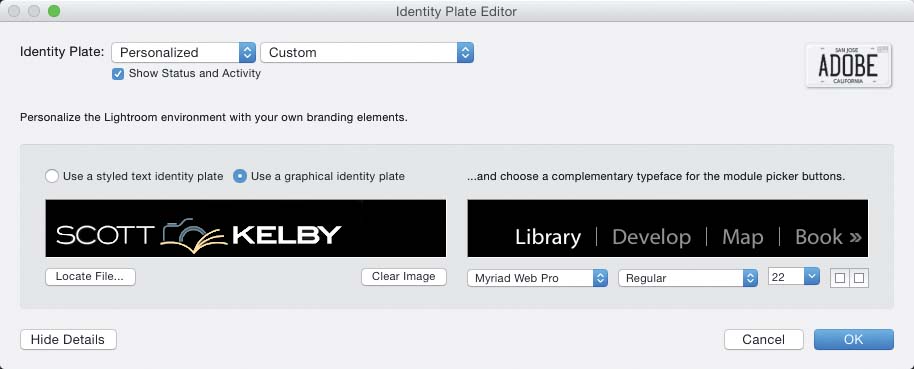
Go under the Lightroom (PC: Edit) menu and choose Identity Plate Setup to bring up the Identity Plate Editor (shown above). To replace the Lightroom logo with your own logo, choose Personalized from the Identity Plate pop-up menu at the top left of the dialog. Now, in the main section below, click on the Use a Graphical Identity Plate radio button, and then click on the Locate File button below the preview. Navigate your way to your logo, click Choose, and that’s it—it replaces the Lightroom logo with your logo. If you don’t have a logo graphic, you can change the Lightroom logo to your studio’s name: just leave the Use a Styled Text Identity Plate radio button selected and
type in whatever you’d like (the name of your studio, company, etc.). While your type is still highlighted, use the pop-up menus right below the text field to choose your font, font style (bold, italic, etc.), point size, and font color (click the little color swatch).